

- Active
- November 13, 2025
- 19 Pavilion Grove, S...
CAR PORCH TILING WORKS
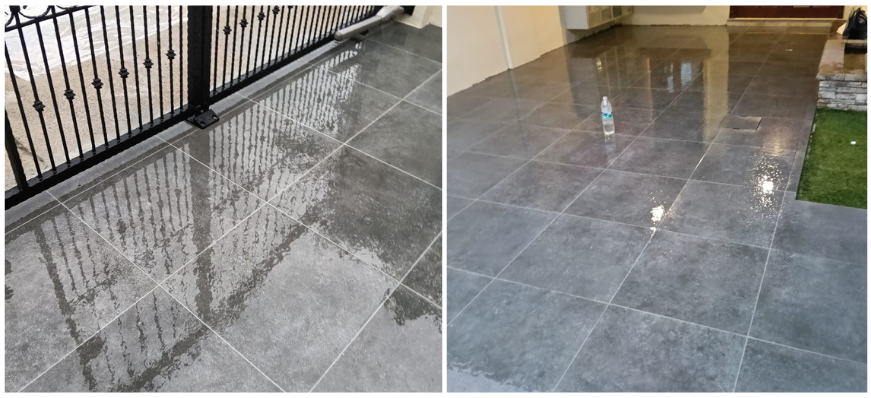
When it comes to outdoor spaces like your car porch, durability, precision, and a neat finish are key to achieving a long-lasting result. Our team recently completed a car porch retiling project that not only enhanced the overall appearance but also ensured strength and stability to withstand daily vehicle movement and weather exposure.
✅ Scope of Work:
1. Hacking and Disposal:
We began by hacking and removing the existing floor tiles from the car porch area. All debris and waste materials were properly disposed of at an approved dumping ground, maintaining a clean and safe work environment throughout the process.2. Surface Preparation:
The surface was thoroughly cleaned and prepared for new tiling. To ensure strong adhesion between the existing surface and the new screed layer, we applied a W1 bonding agent and cement strengthener — enhancing the durability and bond strength of the finished surface.3. Screeding Works:
A 30–40 mm thick screed layer was provided and laid across the entire car porch area to achieve a uniform and proper floor level. This created a solid and even base, ensuring the perfect foundation for precise tile installation.4. Tiling Works:
We supplied and installed 600 mm × 600 mm × 18 mm floor tiles, aligning each tile carefully for a consistent and professional appearance. The tile supply was included within the project scope, with the unit rate not exceeding $5.50 per sqft (inclusive of GST).For this project, we utilized premium-grade tiles, strong bonding materials, and high-performance screed mix — ensuring a durable, weather-resistant, and visually appealing car porch finish built to last for years.
🌟 Why Homeowners Trust Us for Their Works:
-
Expertise in outdoor tiling and surface leveling
-
Use of premium materials for long-lasting performance
-
Attention to detail for a smooth and even finish
-
Timely completion with professional site cleanup
-
Transparent pricing with no hidden costs
📞 Thinking of Retiling Your Car Porch?
Contact Tech Pay Solutions for expert tiling services that combine durability, precision, and modern design to give your car porch a sleek, refreshed look.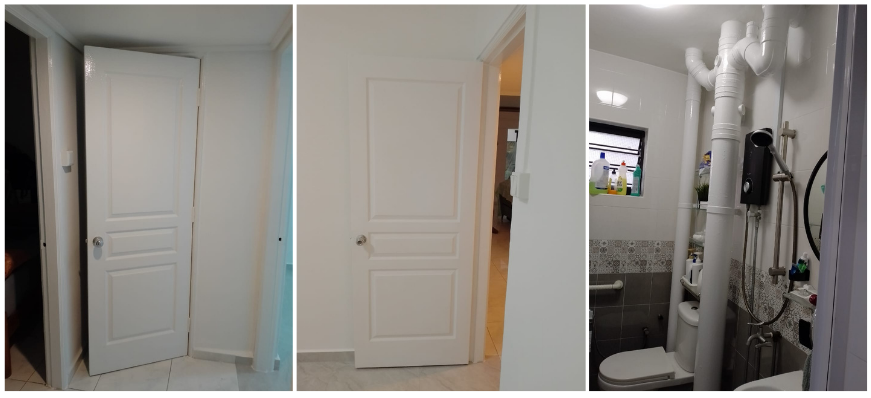
- Active
- November 13, 2025
- Woodlands St 83, Blo...
Painting Works, Screeding & Surface Preparation and Door Painting
When it comes to interior renovations, a flawless finish begins with proper preparation and high-quality materials. Our team recently completed an interior painting project that included screeding, surface preparation, and door painting—enhancing the space with a clean, elegant, and long-lasting finish.
✅ Scope of Work:
Painting Works:
We used Nippon Odourless 3-in-1 White paint, known for its smooth texture and low-odor formula—ideal for interior applications. The process involved applying two coats of primer followed by two coats of paint, ensuring uniform coverage, a bright white finish, and superior durability.Screeding & Surface Preparation:
As part of additional works, our team performed screeding and surface preparation for two rooms. This step ensured that all wall surfaces were properly leveled and smooth, providing the perfect base for paint adhesion and an even final appearance.Door Painting:
Five doors were sanded, primed, and painted using premium white oil-based paint. The result is a neat, glossy finish that enhances both the durability and overall aesthetic of the interior.For this project, we focused on detail-oriented workmanship and used high-quality materials to deliver a polished, long-lasting result that brightens and refreshes the living spaces.
🌟 Why Homeowners Trust Us for Their Works:
-
Expertise in interior painting and surface preparation
-
Use of premium Nippon paint products for lasting results
-
Smooth, uniform finishes with minimal odor
-
Professional team ensuring neat, precise workmanship
-
Timely completion and clean site handover
-
Transparent pricing with no hidden costs
📞 Thinking of Refreshing Your Home Interiors?
Contact Tech Pay Solutions for professional painting and finishing services that combine quality, precision, and beauty—transforming your space into a bright and welcoming environment.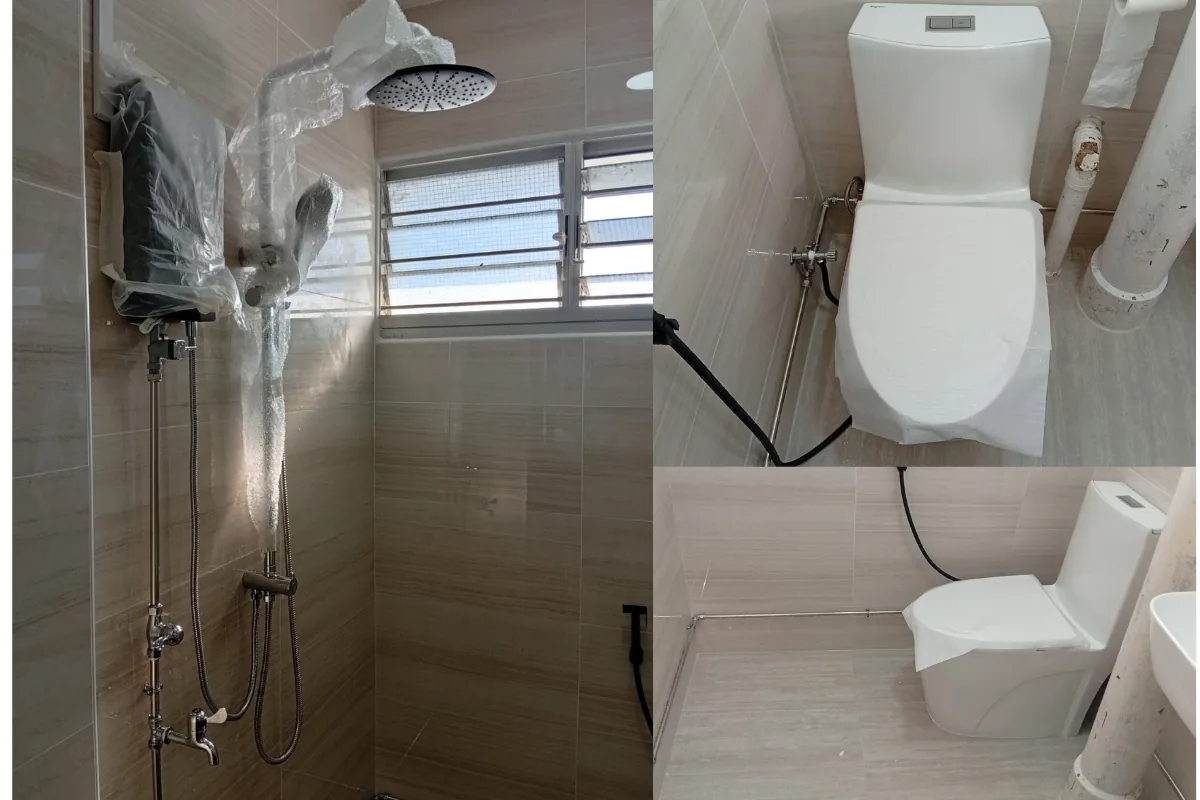
- Active
- July 08, 2026
- Ang mo kio ave10 Bl...
2 Toilets renovation with tile overlay works
Our client engaged Tech Pay Solutions to carry out a complete renovation of both the Common Toilet and Master Toilet, including tile replacement, waterproofing, plumbing modifications, sanitary ware installation, electrical works, ceiling painting, and toilet door replacement. Following a detailed site inspection by our experienced project manager, we assessed the existing conditions, discussed the client's renovation requirements, and provided the most suitable solutions. After obtaining the client's approval, we commenced the renovation works in accordance with industry standards and Singapore regulations.
The renovation began with hacking and removal of the existing wall and floor tiles in both toilets, together with the careful demolition of the designated area required for the relocation of the wash basin sanitary pipeline. All debris and demolished materials were removed and disposed of responsibly. Our plumbing team then modified and extended the existing sanitary drainage pipeline to suit the new basin location, ensuring proper alignment, gradient, and reliable functionality.
Once the hacking works were completed, the affected surfaces were thoroughly cleaned and prepared. W1 Cement Strengthener was applied to improve the bonding strength of the substrate, followed by two coats of ARDEX Quickseal 104 waterproofing membrane to all hacked and wet areas. The waterproofing system was allowed to cure in accordance with the manufacturer's recommendations, providing a durable waterproof barrier to prevent future water seepage before tile installation commenced.
After the waterproofing works were completed, we proceeded with the installation of the new wall and floor tiles. Premium tile adhesive, Weber E-MIX Tile Fix 303, was used to achieve superior bonding strength and long-lasting performance. Using professional installation tools, tile spacers, laser leveling equipment, and precision cutting tools, every tile was carefully aligned to achieve straight joint lines, consistent spacing, and an aesthetically pleasing finish. Both the Common Toilet (170 sqft wall tiles & 30 sqft floor tiles) and the Master Toilet (144 sqft wall tiles & 25 sqft floor tiles) were completed with high-quality workmanship.
Following the tile installation, all tile joints were cleaned before applying AM-50 tile grout. The grout was evenly filled into every joint and excess material was removed to achieve a neat, durable, and attractive finish. The completed tiled surfaces were then cleaned thoroughly to enhance the final appearance.
Our plumbing team subsequently supplied and installed new SS304 stainless steel water supply pipelines for both toilets. The stainless steel plumbing system provides excellent corrosion resistance, durability, and long-term reliability while ensuring an efficient water supply to all sanitary fittings.
The existing sanitary fittings were then carefully dismantled and disposed of before installing the client's new sanitary wares. Installation included 2 Water Closets (WC), 2 Wall-Hung Wash Basins with Basin Taps, 2 Shower Sets, 1 Two-Way Tap, 1 Bidet Spray, and 6 Shampoo Holders with Marble Slabs. Every sanitary fitting was securely installed, aligned, sealed, and tested to ensure proper operation and leak-free performance.
The existing instant water heaters were carefully removed before renovation and reinstalled after all tiling works had been completed. Necessary plumbing and electrical connections were checked, followed by testing to ensure the water heaters operated safely and efficiently.
Upon completion of the sanitary installation, the client's supplied bathroom mirrors were professionally installed at the designated locations, ensuring proper alignment and secure fixing to complement the completed renovation.
The ceiling surfaces of both toilets were then prepared by cleaning and repairing minor imperfections before applying two coats of premium anti-mould ceiling paint. This provided a fresh appearance while offering long-lasting protection against moisture and mould growth.
Our licensed electricians carried out all required electrical modifications, including relocating the electrical wiring for the instant water heaters, installing new power points where required, routing electrical cables safely, and conducting complete testing and commissioning. All electrical works were performed in accordance with standard electrical practices to ensure safety and reliability.
Finally, the existing toilet doors were removed and disposed of before installing two new slide-and-swing toilet doors complete with all necessary accessories, hinges, hardware, locking systems, alignment adjustments, and operational testing. Each door was carefully adjusted to ensure smooth and reliable operation.
Throughout the project, Tech Pay Solutions utilized premium construction materials, including W1 Cement Strengthener, ARDEX Quickseal 104 Waterproofing Membrane, Weber E-MIX Tile Fix 303, AM-50 Tile Grout, and SS304 Stainless Steel Plumbing Components, together with professional installation equipment to achieve precision, durability, and superior workmanship.
The renovation was successfully completed, delivering two modern, durable, waterproof, and aesthetically pleasing bathrooms. Through meticulous planning, quality materials, and skilled craftsmanship, Tech Pay Solutions provided a complete toilet renovation that enhances both functionality and long-term value while meeting the client's expectations.
.webp)
- Active
- July 11, 2026
- Blk432A Northshore D...
Marble Installation works
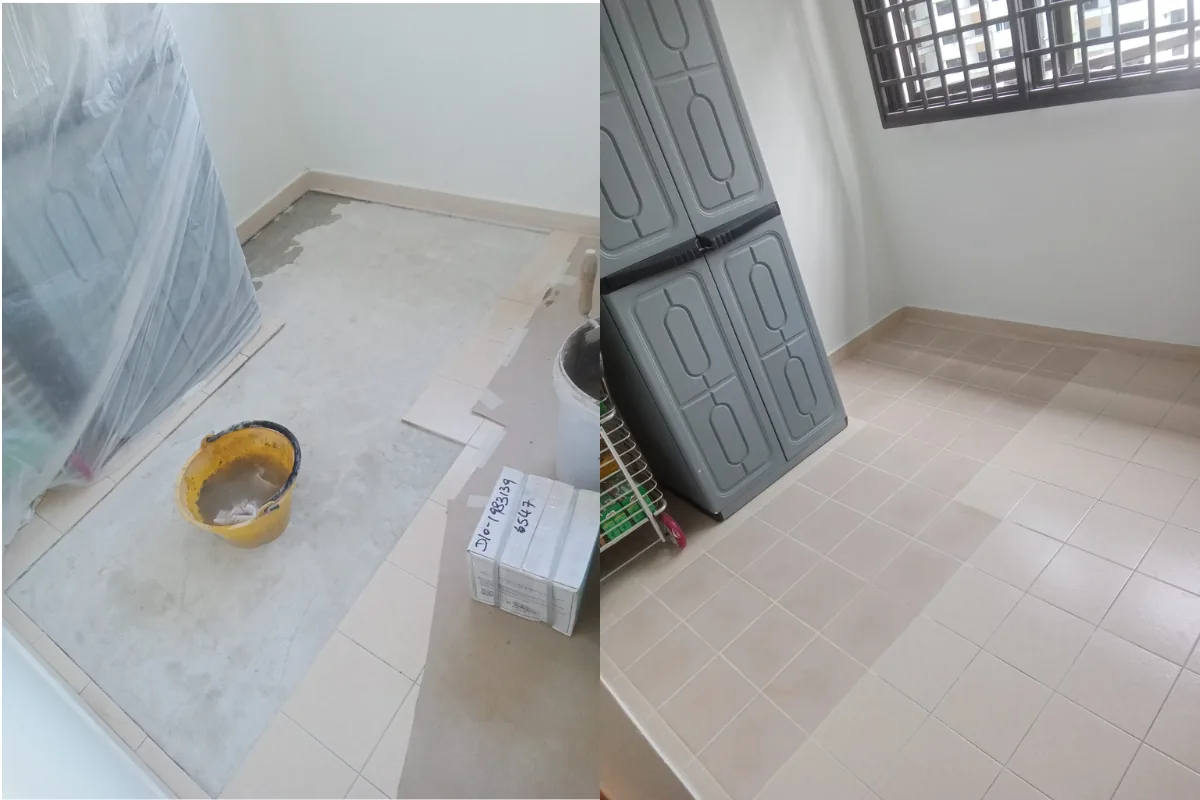
Our client contacted us to install premium marble flooring in the living room, dining room, and bedrooms as part of their home renovation project. Following a detailed site inspection by our experienced project manager and installation team, we assessed the floor condition, verified the existing floor levels, and discussed the client's preferred marble design, layout, and finishing requirements. After confirming all measurements and obtaining the necessary approvals, we scheduled the installation and arranged for the marble slabs to be delivered near the block. Our team then carefully transported the marble materials to the 21st floor using proper handling equipment to prevent damage.
Before commencing the marble installation, the existing floor surface was thoroughly cleaned and inspected to ensure it was free from dust, debris, oil, and loose particles. We then applied W1 Cement Strengthener to improve the bonding strength between the substrate and the screed, ensuring a durable and long-lasting foundation. Where required, the floor was leveled using Davco Floor Screed ECO at a thickness of approximately 30–40mm to eliminate uneven surfaces and achieve the correct floor level. Laser Markers and leveling tools were used throughout the process to ensure maximum accuracy. The screed was then allowed to cure for three days, providing sufficient strength before the marble installation commenced.
Once the screed had fully cured, our skilled installers began laying the marble flooring using White E-Mix Marble Fix, a premium marble adhesive specially designed for natural stone installation. The adhesive was mixed to the correct consistency using an Electric Mixer with Paddle before being evenly spread with a Notched Trowel to achieve the recommended thickness. Each marble piece was carefully positioned according to the approved layout, while Laser Markers, Tile Spacers, and Rubber Mallets were used to ensure perfect alignment, consistent joint spacing, and a level finish throughout the installation. Every marble slab was checked individually to maintain uniformity and minimize lippage.
Following the floor installation, our team proceeded with the installation of approximately 20–25 metres of marble skirting, ensuring the skirting aligned perfectly with the flooring while providing a clean and elegant finishing detail. The skirting pieces were securely fixed using suitable marble adhesive, with all joints carefully aligned to create a seamless appearance throughout the living room, dining room, and bedroom areas.
After the marble installation was completed, we carried out marble gum grouting to fill all joints and eliminate small gaps between the marble pieces. High-quality marble gum was carefully colour-matched to complement the marble surface, providing a neat, durable, and aesthetically pleasing finish. Excess material was removed, and the joints were finished smoothly to ensure a seamless appearance across the entire floor.
Once the marble gum had fully cured, we commenced the marble grinding and polishing process using professional-grade polishing machines and diamond abrasive pads. Multiple grinding and polishing stages were carried out to remove minor surface imperfections, level the marble, and restore its natural shine. This process enhanced the marble's smoothness, gloss, and overall appearance while improving its durability and ease of maintenance.
To provide long-term protection, a premium marble sealant was applied after the polishing process. The sealant penetrated the marble surface to reduce water absorption, resist stains, and protect against everyday wear while preserving the marble's natural beauty. A final quality inspection was then conducted to ensure the flooring, skirting, grouting, polishing, and sealing met our strict workmanship standards.
Throughout the project, we utilized premium materials including W1 Cement Strengthener, Davco Floor Screed ECO, White E-Mix Marble Fix, high-quality marble gum, professional diamond polishing abrasives, and premium marble sealant. Professional equipment such as Laser Markers, Electric Mixer with Paddle, Notched Trowels, Rubber Mallets, Leveling Tools, Grinding Machines, Polishing Machines, and Buffing Pads were used to achieve exceptional workmanship and precision.
The project was successfully completed, delivering a luxurious marble flooring installation with premium marble gum grouting, professional grinding, polishing, and protective sealing. The completed flooring provides a smooth, elegant, and highly durable finish that enhances the beauty and value of the client's home while ensuring long-lasting performance.